User Authentication in CakePHP
A friend of mine asked for a custom website, so here I am, writing a custom cms. I know, there are plenty of systems out there that would handle his needs, but it’s also a good excuse to play around with CakePHP 3, so here we are.
For the lazy, the codebase we’ll be working on will be available on GitHub. I will be pushing each set of changes on the date when each blog post in this series is published. No cheating!
Requiring User Authentication
First, we’ll start by locking everything down. I’m going to centralize all my auth-related loading code in AppController::loadAuthComponent() method:
    /**
     * Configures the AuthComponent
     *
     * @return void
     */
    protected function loadAuthComponent()
    {
        $this->loadComponent('Auth', [
            'authorize' => ['Controller'],
            'loginAction' => [
                'plugin' => null,
                'prefix' => false,
                'controller' => 'Users',
                'action' => 'login'
            ],
            'loginRedirect' => '/',
            'logoutRedirect' => '/',
            'authenticate' => [
                'all' => [
                    'fields' => ['username' => 'email', 'password' => 'password'],
                ],
                'Form',
            ]
        ]);
   }
We’ll walk through this a bit at a time:
- Components are behavioral modifiers for Controllers. They are useful for adding logic around the request/dispatch cycle. The alternative is to use PSR-7 middleware, but as the migration to PSR-7 is currently underway, we’ll be using this method for now.
- You can load a component using
Controller::loadComponent(). The first argument is the component alias, and the second is an array of options for that component. This class loading pattern is pretty much the same all over CakePHP. You can also alias a component if you wish, by setting theclassNameoption to your specific class. - Authentication in CakePHP is controlled via the
AuthComponent. - We’ve set a few options that should be pretty straightforward.
- The
authorizekey is used to specify the authorization method. This will allow us to approve or deny access to a particular plugin/controller/action set. TheControllermethod lets us use a specialisAuthorized(array $user)method to check if a user has access to an action. - One thing that may need explanation is the
authenticateoption. It allows us to specifyAuthenticateclasses that can be used to, well, “authenticate” a user. The most common class in use is theFormclass, which enables form-based authorization. You must specify a class in order to enable that authorization method. I’ve also specified anallkey whose options are inherited by the other classes.
- The
I’m going to call this method from my AppController::initialize(), right before loading any other components. As we’ve setup Controller-based authorization, our AppController will need an isAuthorized(array $user) method. Here is mine (I’m blocking access to everything):
    /**
     * Check if the provided user is authorized for the request.
     *
     * @param array|\ArrayAccess|null $user The user to check the authorization of.
     *   If empty the user fetched from storage will be used.
     * @return bool True if $user is authorized, otherwise false
     */
    public function isAuthorized($user = null)
    {
        return false;
    }
We also need to make a very small addition to our User Entity class, located in src/Model/Entity/User.php. The User entity needs to have a custom password setter that will automatically hash a password on save. This is important for when we create users in our database. Why? Because it would be a real shame to store passwords in plain-text in the database. Lets create a Trait to hold this logic. Add the following to src/Model/Entity/PasswordHashingTrait.php:
<?php
namespace App\Model\Entity;
use Cake\Auth\DefaultPasswordHasher;
trait PasswordHashingTrait
{
    protected function _setPassword($password)
    {
        return (new DefaultPasswordHasher)->hash($password);
    }
}
What is a Trait? Traits are little snippets of code that allow you to reuse logic across classes. Think of them as little mix-ins that you can use to make a Cat quack like a Duck. See the PHP documentation for more details.
Now add this trait to your User Entity class. To do so, add the following inside the class:
use \App\Model\Entity\PasswordHashingTrait;
This will tell PHP to include the PasswordHashingTrait inside of our User Entity, giving it the ability to automatically hash passwords. Neat.
Once that’s done, we’ll need the actual login/logout methods, but for now, lets commit these changes:
git add src/Controller/AppController.php src/Model/Entity/PasswordHashingTrait.php src/Model/Entity/User.php
git commit -m "Configure the AuthComponent and automatically hash passwords"
Creating a User
We’ll need to create a user in our database. This is pretty boring, so I just created a shell to do it. Here is my shell (it goes in src/Shell/UserShell.php):
<?php
namespace App\Shell;
use Cake\Console\Shell;
use Cake\ORM\TableRegistry;
use Cake\Utility\Inflector;
/**
 * User shell command.
 */
class UserShell extends Shell
{
    /**
     * main() method.
     *
     * @return bool|int Success or error code.
     */
    public function main()
    {
        $data = [];
        $fields = [
            $this->params['username-field'],
            $this->params['password-field']
        ];
        foreach ($fields as $field) {
            $value = null;
            $fieldName = Inflector::humanize($field);
            while (empty($value)) {
                $value = $this->in(sprintf('%s?', $fieldName));
            }
            $data[$field] = $value;
        }
        $this->out('');
        $continue = $this->in('Continue?', ['y', 'n'], 'n');
        if ($continue !== 'y') {
            return $this->error('User not saved.');
        }
        $this->out('');
        $this->hr();
        $table = TableRegistry::get($this->params['table']);
        $entity = $table->newEntity($data, ['validate' => false]);
        if (!$table->save($entity)) {
            return $this->error(sprintf('User could not be inserted: %s', print_r($entity->errors(), true)));
        }
        $this->out(sprintf('User inserted! ID: %d, Data: %s', $entity->id, print_r($entity->toArray(), true)));
    }
    /**
     * UserShell
     *
     * @return ConsoleOptionParser
     */
    public function getOptionParser()
    {
        $parser = parent::getOptionParser();
        $parser->description('The User shell can create a user on the fly for local development.');
        $parser->addOption('table', [
            'short' => 't',
            'help' => 'Name of Table class (with plugin prefix) to use to create a user',
            'default' => 'Users',
        ]);
        $parser->addOption('username-field', [
            'short' => 'u',
            'help' => 'Name of username field',
            'default' => 'username',
        ]);
        $parser->addOption('password-field', [
            'short' => 'p',
            'help' => 'Name of password field',
            'default' => 'password',
        ]);
        return $parser;
    }
}
LOTS OF CODE! A few notes:
- This might be familiar to anyone who has seen any of my other blog posts.
- This is an interactive shell that will ask you two questions - Username/Password - and create the User for you.
- We’ve exposed a few ways of customizing the shell usage, including modifying the table, username-field, and password-field. You might even wish to further customize it to give automatic values for these fields.
- I’m not validating the data, and will assume it’s good.
You can run this shell - and answer the questions - via the following command:
bin/cake user --username-field email
And you’ll get an error. Why? Because you cannot save null to the avatar and avatar_dir fields. Poo. Lets fix that by creating a migration. First, lets generate a scaffold for the migration:
bin/cake bake migration alter_users avatar:string? avatar_dir:string?
We’ll need to change the migration slightly to accommodate for the fact that the fields already exist. You can do this by changing addColumn to changeColumn in the generated migration file. Once thats done, lets run the migration:
bin/cake migrations migrate
Now run the users shell:
bin/cake user --username-field email
If you run it again with the same options, you’ll see it happily inserts the same email address again. Boo. Delete that record however you wish, but lets create a migration to ensure that doesn’t happen again:
bin/cake bake migration unique_users
The contents of the change method should be as follows:
    /**
     * Change Method.
     *
     * More information on this method is available here:
     * http://docs.phinx.org/en/latest/migrations.html#the-change-method
     * @return void
     */
    public function change()
    {
        $table = $this->table('users');
        $table->removeIndex([
            'email',
        ], [
            'name' => 'BY_EMAIL',
            'unique' => false,
        ]);
        $table->addIndex([
            'email',
        ], [
            'name' => 'UNIQUE_EMAIL',
            'unique' => true,
        ]);
        $table->update();
    }
Now run the migration:
bin/cake migrations migrate
And our users table should be set. Lets commit our changes before we get lost:
git add config/Migrations/* src/Shell/UserShell.php
git commit -m "Allow user creation via shell and fix our users table"
Login and Logout
A given controller is made up of a collection of actions. Normally, you’d add the following to your controller to enable login/logout functionality in your app:
    public function login()
    {
        if ($this->request->is('post')) {
            $user = $this->Auth->identify();
            if ($user) {
                $this->Auth->setUser($user);
                return $this->redirect($this->Auth->redirectUrl());
            }
            $this->Flash->error(__('Invalid username or password, try again'));
        }
    }
    public function logout()
    {
        return $this->redirect($this->Auth->logout());
    }
The above is copied verbatim from the CakePHP book, an excellent source for all things CakePHP.
You’re totally welcome to do that, but I’m not going to because I’m even lazier than that and cannot be arsed to copy the code. Remember how I said Crud has “action” classes that we can reuse across your application? Lets lean on it here and install the CrudUsers plugin.
composer require friendsofcake/crud-users
The CrudUsers plugin has action classes for various user-related functionality, including a LoginAction and LogoutAction. These can be “mapped” to action names using CrudComponent::mapAction(). Add the following code to your - mostly empty - UsersController, located in src/Controller/UsersController.php:
    /**
     * Initialization hook method.
     *
     * Use this method to add common initialization code like loading components.
     *
     * e.g. `$this->loadComponent('Security');`
     *
     * @return void
     */
    public function initialize()
    {
        parent::initialize();
        $this->Crud->mapAction('login', 'CrudUsers.Login');
        $this->Crud->mapAction('logout', 'CrudUsers.Logout');
    }
If you browse to any part of your site in a browser, you should be redirected to a page like the following:
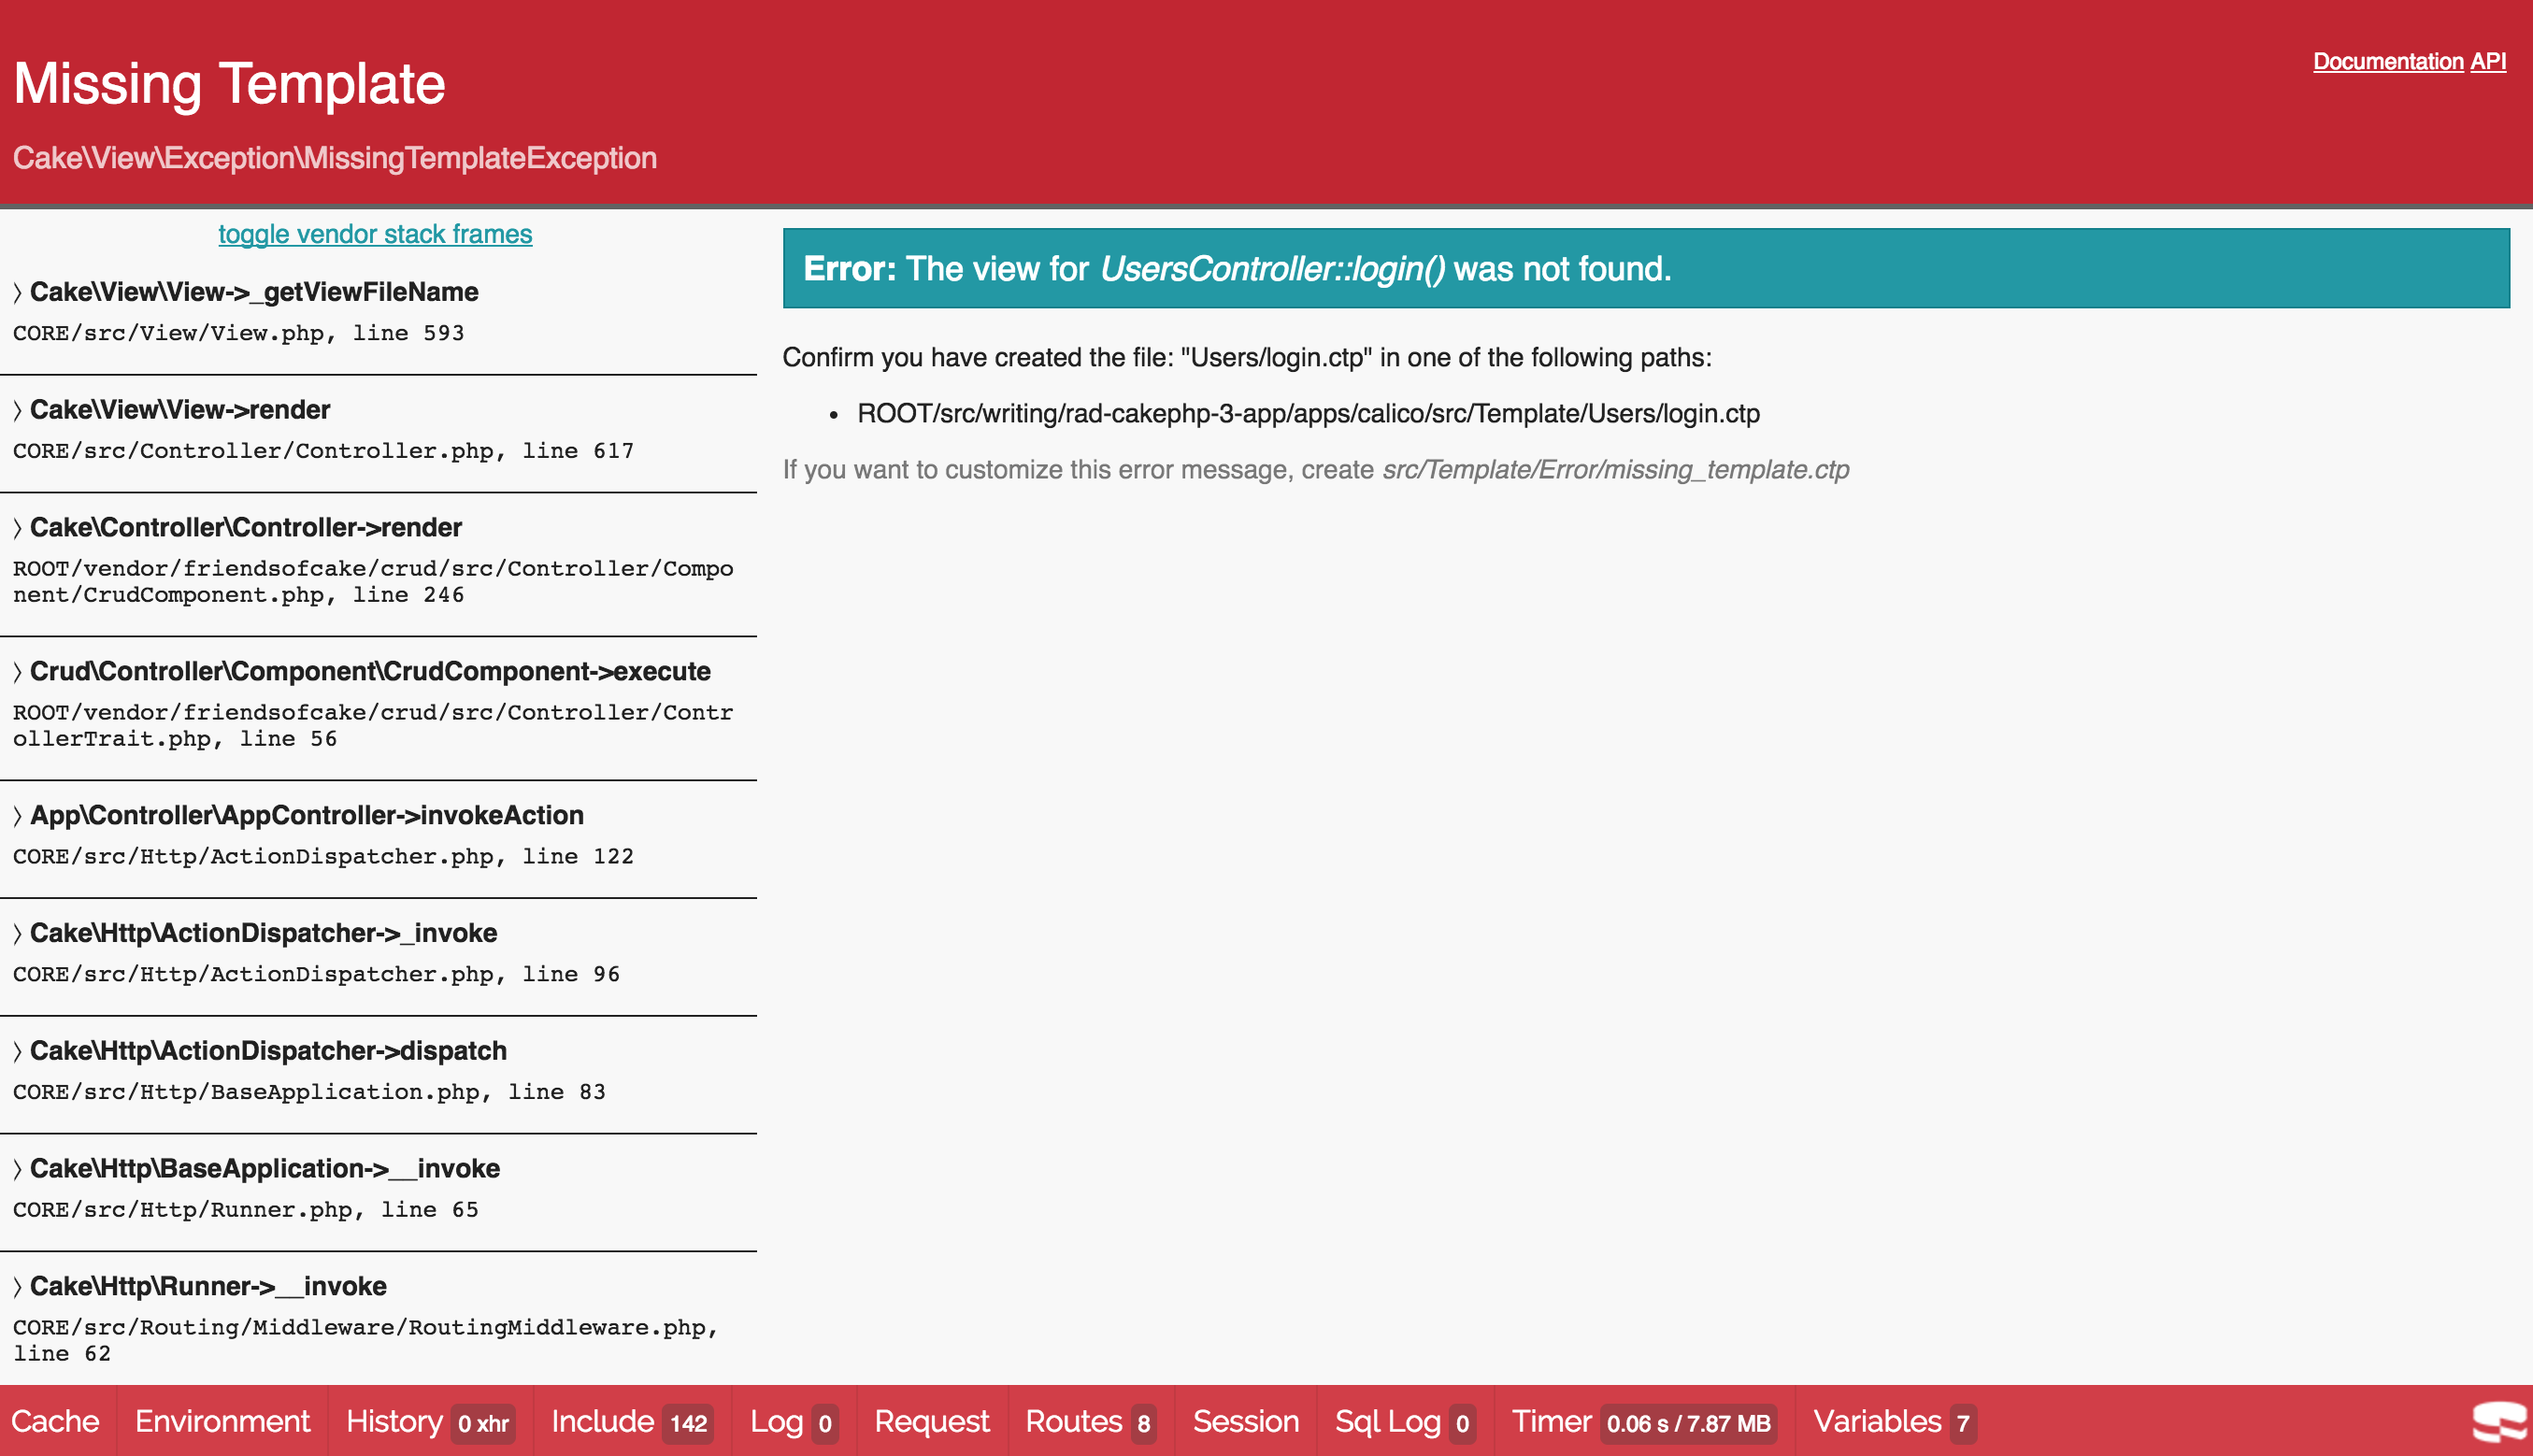
If you don’t have CakePHP installed under a web server, you can start up the built-in PHP server by running
bin/cake server. Your application will be accessible at http://localhost:8765.
While the CrudUsers plugin does have an action class for login, we’ll still need the relevant cake template file. Thankfully, we can just create it using the Bake plugin, which has a sample login.ctp for use with our apps:
bin/cake bake template Users login
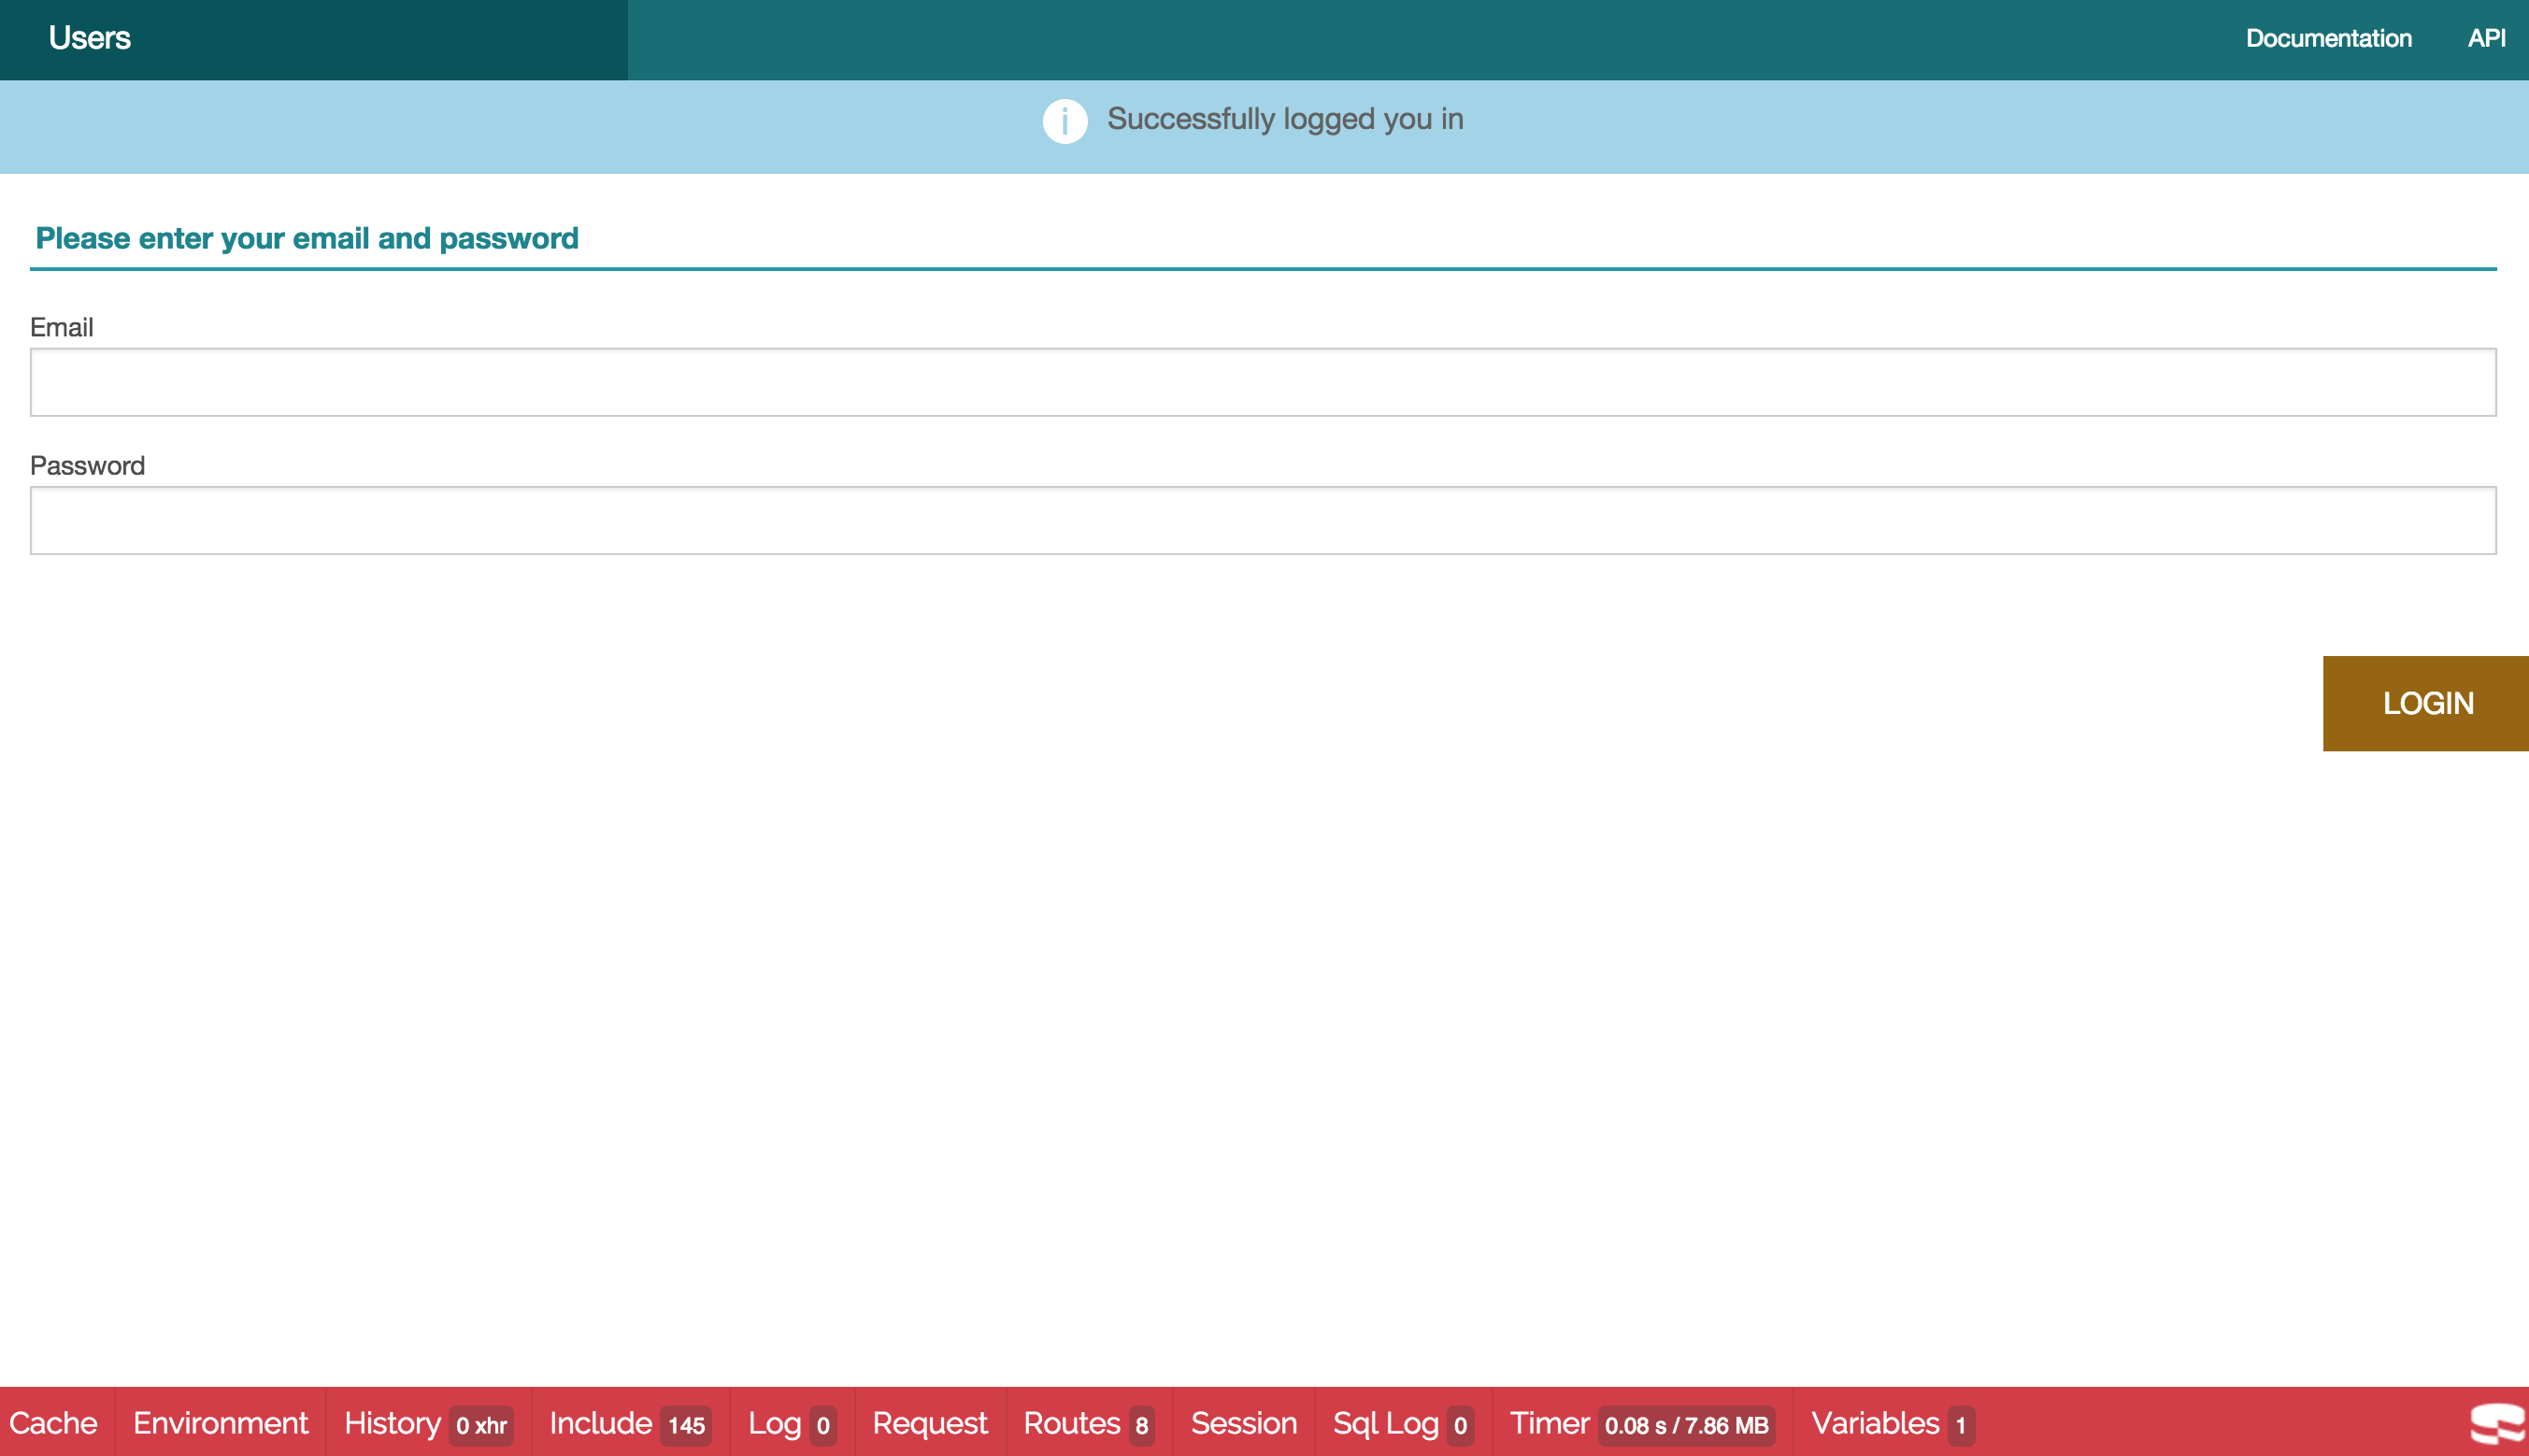
We’ll need to make one very small change to the generated src/Template/Users/login.ctp. It currently references a username field when it should instead reference the email field. Once this is done, browse to /users/login, and attempt to login with the credentials you created before. You should get a page like the following:
To allow logging out, we’ll need to explicitely whitelist it for authenticated users. Add the following to your UsersController to do so:
    /**
     * Check if the provided user is authorized for the request.
     *
     * @param array|\ArrayAccess|null $user The user to check the authorization of.
     *   If empty the user fetched from storage will be used.
     * @return bool True if $user is authorized, otherwise false
     */
    public function isAuthorized($user = null)
    {
        if ($this->request->param('action') == 'logout') {
            return true;
        }
        return parent::isAuthorized($user);
    }
And now browse to /users/logout. You’ll be redirected back to the login with potentially confusing flash messages. You are in fact logged out. The error messages are because we haven’t allowed access to / in our app. We can fix that later, but for now, lets save our progress:
git add composer.json composer.lock src/Controller/UsersController.php src/Template/Users/login.ctp
git commit -m "Working login flow"
For those that may just want to ensure their codebase matches what has been done so far, the codebase is available on GitHub and tagged as 0.0.2.
Yep, we’re stopping here. We did say we’d get the whole forgot-password flow working, but it’s about quittin’ time for the day and we’ve covered quite a bit of ground. We’ll save that task for tomorrow, and also create a viewable landing page for our app.
Be sure to follow along via twitter on @savant. If you’d like to subscribe to this blog, you may follow the rss feed here. Also, all posts in the series will be conveniently linked on the sidebar of every post in the 2016 CakeAdvent Calendar. Come back tomorrow for more delicious content.